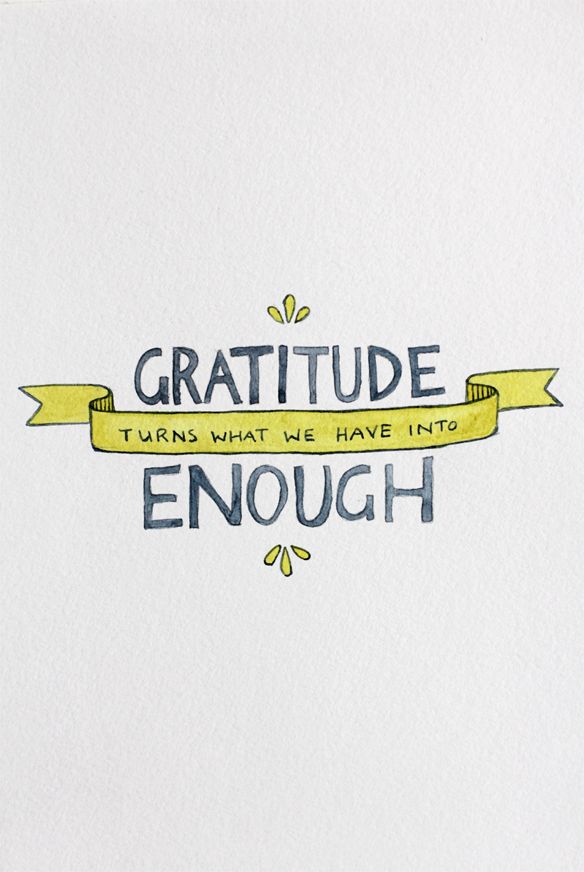
Is yours a YES, or a no?

This is the time of year when we start thinking of all the things in our lives that we wish were just a little--or maybe a whole lot--different. 

A new year, a new start? 

I have friends that have a wonderful tradition of picking a "word of the year," a single word that encapsulates all that they hope 2017 will be for them--an ideal to work towards, a touchstone to bring them back to what matters, a mantra to focus on when they feel they are getting off track. 

I know others who are focusing on changing just one behavior. As it is said, change just one thing, and see all of the amazing results that can come from that one simple shift... 

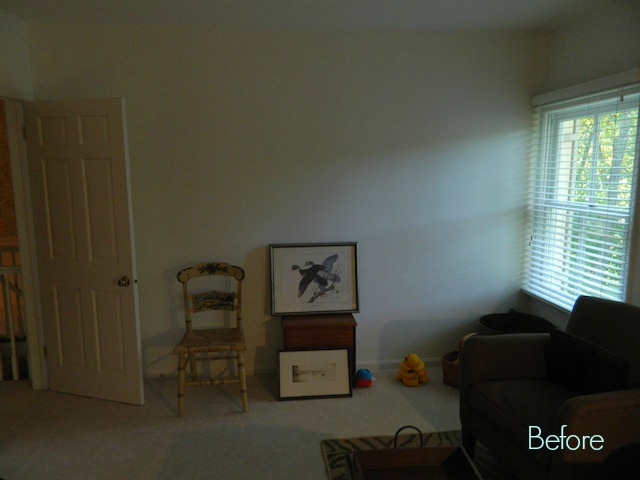
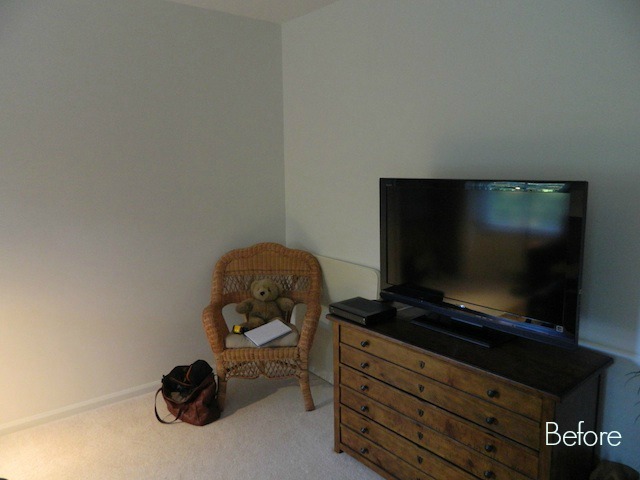
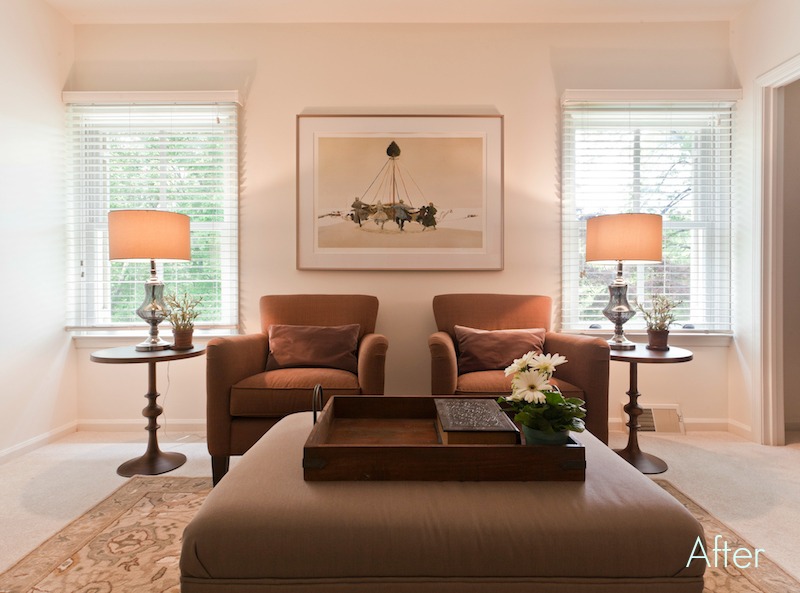
But what about your house? How does this environment that we spend so much of our time in contribute to your vision for the new year and beyond? In reality, it can either hold us back or help push us forward, each day it can either encourage or discourage us in the things we want to do and long to create. 

When you picture your home in your mind's eye, do you have the gut feeling of "YES!"--or maybe do you get a weak, milk toast feeling of "no"...?

If you have ever been to one of my workshops, you know that I often start the class with a guided meditation of sorts where we picture one of your life's "best places," a place where you felt the most like yourself when you were a kid or young adult.

You should see the serene smiles on people's faces when they revisit these beautiful locations in their mind. This is what a YES looks like. 

If you know that you want to make a change in 2017, and want your home to be a part of creating that meaningful shift--if you want that YES-- I have just the thing for you! Here is a special tool to get you off on the right foot as we turn the page on the calendar. 

This will only be available for the next two weeks, so don't delay--CLICK HERE to check it out. Happy New Year!!


All That Darkness--That Little Mighty Light

Last year at this time someone told me a story about a person completely enveloped in darkness, locked in a room so dark they couldn't see their hand when held just inches in front of their face. That darkness seemed all-powerful, omnipresent...that is until someone lit a candle. 

As dominant and dire as the darkness had seemed, it was completely powerless against the small flame of a single candle.  The light was small, but it was mighty. 

We have just lived through the shortest, darkest day of the year, the Winter Solstice--a cold, dreary time of year when things can feel pretty bleak. BUT NOW the days will be becoming longer and brighter. Little bit by little bit we are moving toward the light. 

May each of us live into our potential to be a small but mighty source of light in a world that can indeed be very dark at times --and may our homes be sources of comfort, healing, beauty and rest so that our light can shine all the brighter. 


The darkness will be powerless against it. 

Your Christmas Tree--Gorgeous? Or Just Kinda MEH.


The holidays are upon us! 

And since many of you told me how helpful this article was to you last year, I thought it would be good to put it up again to remind us all of the basics of tree trimming.

 Happy decorating!! :)

Just this week someone asked me the darnedest question:

"Can you tell me how to decorate my Christmas tree?"

This time of year, a lot of us are bundling up in our mittens and hats to go pick our tree, while others of us may be hauling an artificial one out of the basement…but what I didn't realize is that many of us never really feel all that satisfied with the way it looks once we have it all trimmed. 

Well, that's not good!


SO, I thought it would be fun once again to share some tips and tricks that I use when decorating my own tree as well as my clients' trees that can really help this centerpiece of our holiday decorations to look dazzling and magical. :) So here goes: 

  1. Be Bright-- the first and most important thing you are going to add to your tree is lights, and lots of them. The formula I most often hear for properly lighting your tree is to use approximately 100 lights per each vertical foot of the tree. I know this sounds like a lot of lights, but once you see the difference this makes, you will never go back to a mere two or three strands sparsely sprinkled on the branches! The reason the number of lights is so important is because the glow and sparkle they give is really what makes the tree come alive visually, and gives it that magical twinkle that literally lights up a room. This year, add more lights. Really. It is a game changer.

  2. Be Consistent--In order for your tree to have visual impact, you need to have elements on it that make it look cohesive and consistent. Usually the best way to do this is to use garland and/or ribbon as well as matching glass balls or other large ornaments all over the tree that are all of the same color scheme. Trees that don't have this grounding element can look chaotic, with each ornament different from the next, and nothing pulling the whole thing together visually. Once you have these foundational elements in place, you can comfortably go on to the next step where you can then add a little of the sentimental chaos….:)

  3. Be Sentimental--The part of our tree that makes it so meaningful are the ornaments that we have collected over the years that are significant to us. To be honest, these are NOT the things that will most likely give your tree the "wow" factor…but they are, after all, what we love about Christmas! After you have completed step two where you have given your tree an overall balance and color scheme, the sentimental ornaments should be sprinkled throughout the limbs, between the colored balls and garland, completing the look of your tree!

I hope that these few ideas help you to feel more confident as you deck the halls this year-- AND I hope this year you are able to step back and smile with pride as you look at your gorgeous, glowing, glittering tree!

Two Simple Steps...& You Don't Even Need A Pair Of Ruby Slippers

Each year for the last several years this week before Thanksgiving, I rewrite a version of this post because I think it is so important. I hope that it speaks to your heart as well...

image from fellowfellow.com

Do you remember Glinda the Good Witch telling Dorothy at the end of The Wizard of Oz, that the power and magic she was seeking had indeed been inside of her all along? It was as true for Dorothy, as it is for each one of us. 

One super power we each possess-- but often forget to use-- is the practice of gratitude. 

We don't need any ruby slippers or magic wands (although that snazzy headdress/tiara thing Glinda wears is pretty darn spectacular...where can I get me one of those??). Nothing extra is required, because today's assignment is so simple you don't need anything that you don't already have. However, these simple steps give you the power to change everything.

Here are the two things you need to do:

1. Notice one thing in your home each day that you are grateful for...

My heater just came on as I am typing this. I am very grateful for heat on this cold morning. Also, I love the way the sun is shining through my office window. So pretty. Look around you with an open heart and notice all of the gifts that we can easily overlook as we all too often furrow our brow and wonder why our home doesn't look like the latest home style magazine. 

2. Write it down.  

This week leading up to Thanksgiving we have a wonderful opportunity to "see" things differently. Taking the next step of writing down that which we are grateful for helps us to really take in all of our blessings. Next Thursday you will have a concrete list of at least seven things (and I bet you will have many more than that) to read over and feel your heart swell with gratitude. You will be amazed at how much your house has changed in a week. You will see you had the power all along....

Extra Credit: Share this with a friend--Things are always more fun with a friend or partner, and knowing that you each are writing a gratitude journal will make it more likely that you will actually do it. Make plans to share your entries with one another on Thanksgiving--what a blessing!


Something Is Missing

Can you see what isn't in this lovely room? 

Not sure? It can be hard to see...

In this cozy den, my client knew she didn't want to change much, but she knew something was missing. The furniture was working well, the paint color was just as she liked it, and she did not want anything different or fussy on the windows.

So, what could still be needed to make the room feel finished?

Like the glue that holds something together, or the icing on top of a birthday cake, things just don't stick together or taste as sweet when that certain something is missing.

In our homes that is what I like to call the "top layer"--the finishing touches such as the right lighting, art, and other decorative elements--the stuff that pulls things together and makes a room come alive.

Here is the room now that we have added that top layer. Hooray!--

So what exactly is different? What elements did we add to pull everything together? 

We started by bringing in a new rug-- I wanted something that would add a softness to the sepia-toned palette--and we added a larger ottoman for extra comfort and more table space.

You may also notice that there are new tables with matching lamps flanking the chairs, giving more presence to the symmetry that was already there.

With such a lovely muted palette, texture becomes even more important. The smooth metal tables, rustic wood tray, the louvered screen in the corner all add interest...


The sparkle and style added by the new lighting can't be ignored, the artwork is placed to best show it off, a new armless chair gives a place to sit and  purpose to a corner.....and the beautiful grandmother clock moved from an adjacent room brings a stately bit of height and history to the space. A cozy room has become even more welcoming!


And to think many would believe the room is finished once the furniture is in place!

There is a whole other layer to be added to bring cohesion and beauty into our homes--so be sure to follow through on those final steps and add those little details that make all the difference. 

As always, a HUGE thank you to Laura Kicey for her amazing photographs of my work!