
What Is Your Next Step?
/Taking on any project all at once can be daunting, and decorating a room is certainly no different.
Breaking a project down into bite-sized morsels makes it easier handle and more fun.
Small steps keep you moving steadily forward, and when you know which step is the next best one to take, eventually you get to where we want to go.
Back in September, I started working with one of my clients who had just moved her family back to the area. She was settling into a new house and wanted to create a feeling of home again. Her goal was twofold: She wanted use items that had worked in her old house, and also figure out which ones no longer worked in the new space.
That’s where I come in! (I love this type of challenge!)
Let’s look at the three steps we used to make great progress in her house. Maybe they will inspire you to take the next step in your home:
Let’s take the first step: (Form & Function)
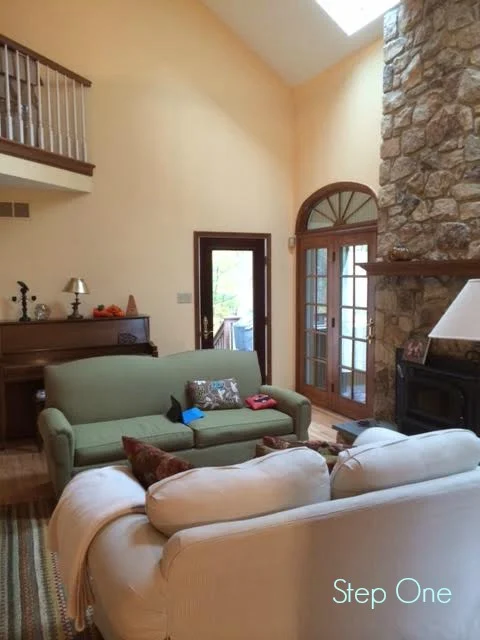
First, you must decide what items can stay and which ones need to GO. :)
Of the items in this photo, my client knew she wanted to keep the green sofa—although the color had always been a challenge. She also liked the area rug, and the piano. The off-white loveseat in the foreground felt old and tired, so we knew that piece could go.
She wanted to use the room as a quiet place for reading, relaxing, and enjoying the fireplace, which meant that lighting and comfortable seating would be important.
Next, Step Two: (Major changes/Purchases)
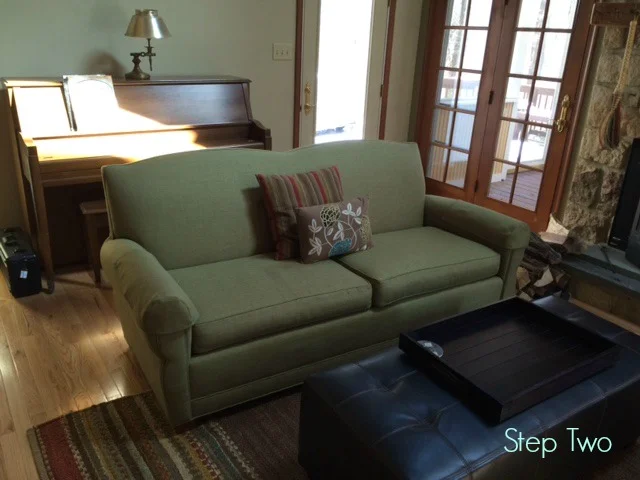
This is the part of the project where construction or other major changes to the room would take place (if needed). If you look closely at the photo, you can see that we selected a new wall color to help the stone of the fireplace and the green of the sofa work better together. After this new color was up, the room really started coming together.
We placed two new, cozy chairs (not pictured) across from the sofa. They are for conversation or for curling up with a good book. We also added a new ottoman to act as a coffee table or a place to put up your feet.
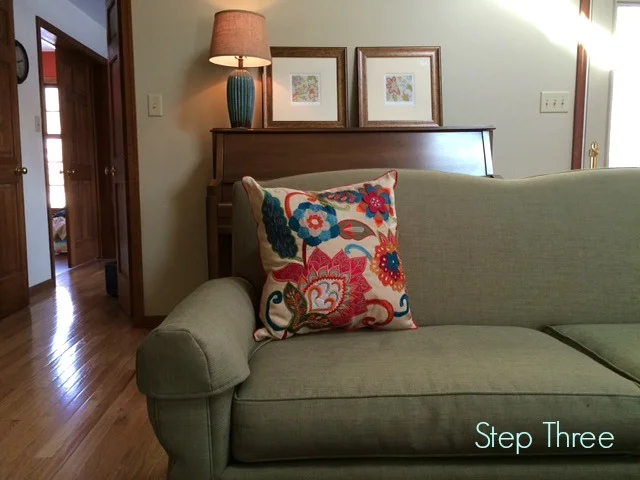
And Step Three: (What I call the “Top Layer”)
Step Three is SO important, yet, it is the one where most people give up and stop before the room is completed.
If rooms were conversations, this step would be the moment when whomever you are talking with finally gets a point you are making, and suddenly exclaims: “OH! NOW I get what you are saying!!”
The Top Layer is the finishing touch that sets the room apart. By adding decorative elements that really show your style, you make the room feel uniquely YOURS.
My client loves color and funky accents, so I knew the bold pillows, the colorful, textured lamp, and new prints echoing the color scheme of the house would make her happy! Note how the orange accent wall down the hall in the background now feels a part of this room, as well.
I love it when the whole house gets along. :)
We made great progress on this first pass, but the room isn’t fully finished, yet. I will share more “after” pictures later when the project is complete. It often takes time and patience to find all of the finishing details for a room, but as each one falls into place it makes a big difference.
If you feel stuck and unsure how to move forward with a room, my Keep Moving Forward program might be the help you’ve been waiting for. Keep Moving Forward helps you take the next step in your decorating project so you can easily pull your room together. Just click here to set up a House Call so we can take a look at your house together through fresh eyes, and get you off to a great start!